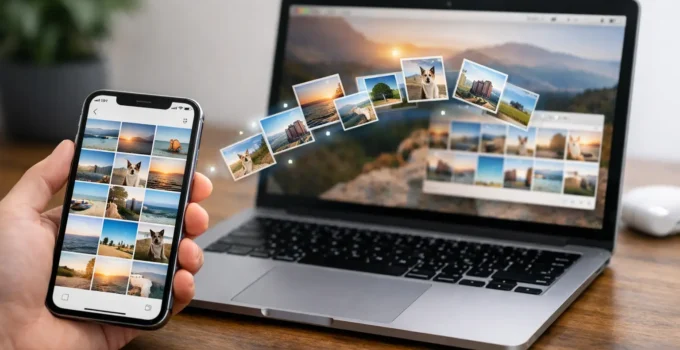
A nearly full iPhone storage alert is often what sends people looking for a way to transfer iPhone photos to MacBook. The right method depends on what you want next: make a local backup, edit a batch of photos, free up phone storage, or simply send a few favorites to your Mac.
For a large camera roll, a USB cable is usually the fastest and most dependable choice. For a handful of pictures, AirDrop takes seconds. iCloud Photos works well when you want your iPhone and MacBook libraries to stay in sync automatically, but it can use substantial cloud storage and bandwidth.
Transfer iPhone Photos to MacBook With a USB Cable
A wired transfer is a good choice for hundreds or thousands of photos, especially when your Wi-Fi is slow or you do not want to rely on iCloud. You need a data-capable cable that fits both devices – typically USB-C to USB-C on newer iPhones and MacBooks, or a Lightning cable with the appropriate Mac adapter.
Connect the iPhone to the MacBook, then unlock the iPhone. If a prompt appears, tap Trust This Computer and enter your iPhone passcode. Your Mac cannot see the photo library until you approve that prompt.
The Photos app may open automatically. If it does not, open Photos from the Applications folder or Launchpad. Select your iPhone under Devices in the left sidebar. You should see the photos and videos available to import.
Choose individual items, or click Import All New Items to bring over everything the Mac has not imported before. Photos can also delete the imported items from the iPhone after transfer if you select that option. Only use it after confirming your pictures appear correctly in your Mac library.
This method imports items into the Mac Photos library, which is convenient for searching, editing, and organizing albums. It is not ideal if you want ordinary image files in a specific Finder folder instead.
Use Image Capture for Files and Custom Folders
Image Capture is a built-in macOS utility that gives you more direct control. Open it through Spotlight search, connect and unlock your iPhone, then select the iPhone in Image Capture’s device list.
At the bottom of the window, choose an Import To location such as Pictures, Desktop, or a folder on an external drive. Select photos and click Import, or choose Import All. The files are copied directly to that location rather than added to Photos first.
Image Capture is especially helpful for photographers, students, and anyone who wants to sort photos into project folders. It also offers a Delete after import option, but leave that unchecked until you have verified the copied files.
Use AirDrop for a Few Photos or Videos
AirDrop is the simplest option when you only need a small set of photos. It sends the original file between Apple devices without a cable, email attachment, or cloud upload.
On the MacBook, open Finder and click AirDrop in the sidebar. Set Allow me to be discovered by to Contacts Only or Everyone for 10 Minutes. On your iPhone, make sure Wi-Fi and Bluetooth are turned on. The devices do not need to be connected to the same Wi-Fi network, though they should be nearby.
In the iPhone Photos app, select the pictures, tap the Share button, then tap the MacBook under AirDrop. Accept the transfer on the Mac if prompted. Files typically arrive in the Downloads folder, where you can drag them into Photos or move them into another folder.
AirDrop is not the best tool for a huge photo archive. Large transfers can take time, and an interrupted connection may require you to resend items. For a dozen vacation shots or a document scan, though, it is hard to beat.
Sync Photos Automatically With iCloud Photos
iCloud Photos is best for people who want their full photo library available across an iPhone, MacBook, iPad, and other Apple devices. Instead of manually copying pictures each time, it syncs changes across devices signed in to the same Apple Account.
On your iPhone, go to Settings, tap your name, choose iCloud, then Photos. Turn on Sync this iPhone. On your MacBook, open Photos, choose Photos from the menu bar, select Settings, click iCloud, and turn on iCloud Photos.
Your library will begin appearing in the Mac Photos app. The first sync can take hours or longer if you have years of photos and videos. Keep both devices connected to power and Wi-Fi if possible.
There is one major trade-off: iCloud Photos is synchronization, not a separate backup by itself. If you delete a photo on the iPhone, it also disappears from the synced Mac library and other connected devices. It remains in Recently Deleted for a limited time, but you should keep an additional backup for irreplaceable family photos or work images.
Also check your MacBook’s storage setting in Photos. Download Originals to this Mac keeps full-resolution files locally, while Optimize Mac Storage saves space by keeping smaller versions on the Mac when storage is tight. Download Originals is the better choice if the MacBook is meant to hold a local copy of your collection.
Why Your iPhone Photos May Not Show Up
If the iPhone does not appear in Photos or Image Capture, start with the basics. Unlock the iPhone, disconnect and reconnect the cable, and look for the Trust This Computer prompt. Try another cable or port if nothing changes. Some charging cables do not carry data reliably.
Restarting both the iPhone and MacBook can clear a stubborn connection issue. It also helps to install current iOS and macOS updates, particularly if the devices have not been updated in a while.
If only some recent photos are missing, check whether iCloud Photos is still syncing on the iPhone. Open Photos and look near the bottom of the Library view for a sync status message. A paused upload, low battery, poor Wi-Fi connection, or lack of available iCloud storage can delay new photos from reaching the Mac.
Photos taken in Apple’s HEIC format should open normally on modern Macs. If you are moving files to an older app or sharing them with a Windows user later, you may need to export JPEG copies from Photos. For video, 4K clips can be very large, so confirm that your MacBook has enough free storage before importing everything.
Choose the Method That Fits Your Goal
Use a USB cable and Photos when you want a dependable bulk import into your Mac library. Choose Image Capture when you want image files placed in a particular folder or external drive. AirDrop is for quick, selective transfers, while iCloud Photos is for an always-updated library across Apple devices.
Before deleting anything from the iPhone, open a few transferred photos and videos on the MacBook. That quick check can save you from discovering too late that a transfer stopped halfway through or a cloud library had not finished syncing.