Moving to a new iPhone should not mean losing access to calls, texts, or two-factor authentication codes. If you searched for “esim transfer iphone,” the good news is that Apple makes the process fairly simple when your carrier supports eSIM Quick Transfer. The catch is that the exact steps depend on your carrier, your old iPhone, and whether you are setting up a new device or adding a line later.
An eSIM is a digital version of the small SIM card that used to slide into a phone. Many newer iPhones, particularly U.S. models starting with the iPhone 14, use eSIM only. That means transferring your cellular plan is an essential part of switching phones, not an optional setup step.
Before You Start an eSIM Transfer on iPhone
A little preparation prevents the most common transfer problems. Keep both iPhones nearby, charged, unlocked, and connected to Wi-Fi. Bluetooth should also be turned on, because the phones use it to detect each other during Quick Transfer.
Your old iPhone should be updated to a recent version of iOS, and the new iPhone should be running the latest version available during setup. You also need the passcode for your old iPhone and the Apple Account password if setup asks for it.
Before removing or erasing anything, check that the old phone can still make a call or show cellular service. If the old eSIM is already inactive, or the old phone is damaged, you will probably need your carrier’s QR code, app, or customer support instead of Apple’s direct transfer option.
It is also worth checking whether your carrier supports eSIM Quick Transfer. Most major carriers do, but support varies by country, prepaid plan, business account, and phone number type. A carrier may require you to verify your account through its app or website before it will activate the eSIM on a new device.
Transfer Your eSIM While Setting Up a New iPhone
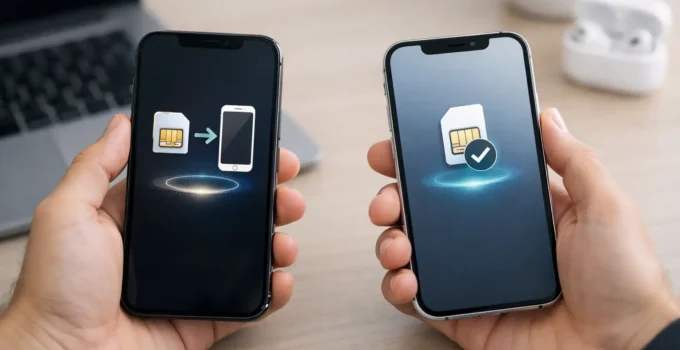
For most people, this is the easiest route. During the new iPhone setup process, select the option to transfer a cellular plan when it appears. Your new iPhone should display phone numbers associated with eSIMs on your old iPhone.
Choose the number you want to move, then follow the prompts on both phones. The old iPhone may ask you to approve the transfer or enter a verification code shown on the new iPhone. After approval, the new device contacts your carrier to activate the plan.
This can take a few minutes. Do not restart either phone or erase the old one while activation is in progress. Once the new iPhone shows signal bars and the carrier name, place a quick call or send a text message to confirm the number works.
When the transfer finishes, the eSIM on the old iPhone is typically deactivated. That is expected. Your number can only be active on one phone at a time unless your carrier offers a separate multi-device service.
How to Transfer an eSIM After iPhone Setup
Already finished setting up the new iPhone? You can often transfer the line from Settings instead.
On the new iPhone, open Settings, tap Cellular, then choose Add eSIM. Select Transfer From Nearby iPhone if it appears. Pick the phone number to move, keep both devices close together, and approve the request on the old iPhone.
If you have more than one number on the old device, repeat the process for each line. This matters for users with a personal and work number, or anyone using a travel eSIM alongside their main plan. Check the label for each line before confirming the move so you do not transfer the wrong one.
After activation, go to Settings > Cellular and make sure the transferred plan is turned on. You can also set which number is used as the default voice line, which line handles iMessage and FaceTime, and which plan provides cellular data.
Use a QR Code or Carrier App When Quick Transfer Is Missing
If the nearby transfer option does not appear, your carrier may use a different activation process. Many carriers provide a QR code in an account dashboard, activation email, or printed eSIM voucher. On the new iPhone, go to Settings > Cellular > Add eSIM, then choose Use QR Code and scan it with the camera.
Some carrier apps can activate or transfer a plan directly. This is common with prepaid and digital-first mobile providers. The app may ask for your account login, a one-time passcode, and your new iPhone’s EID or IMEI. These identifiers are available under Settings > General > About.
Do not scan an old QR code unless your carrier specifically says it can be reused. Many eSIM QR codes work only once. If a code has already been used, request a new one rather than repeatedly trying it and risking an account lock or activation error.
What to Do If Your iPhone eSIM Transfer Fails
An error message does not always mean something is seriously wrong. In many cases, the phones need a better connection or the carrier activation system needs a few extra minutes.
Start by checking Wi-Fi, Bluetooth, and cellular service on the old phone. Restart both iPhones, then try the transfer again. If you are setting up a brand-new iPhone, make sure it has completed any available iOS update before retrying.
If the new iPhone says the plan cannot be transferred, check whether your old iPhone has a physical SIM rather than an eSIM. In that case, the carrier may need to convert the physical SIM plan to eSIM. Some carriers let you do this from the old iPhone by opening Settings > Cellular > Convert to eSIM, but availability varies.
You may also need carrier help if any of these situations apply:
- The old iPhone is lost, broken, erased, or no longer turns on.
- You are moving a business, corporate, prepaid, or restricted account.
- The new iPhone is carrier-locked to a different network.
- You received a message that the eSIM is already in use or cannot be activated.
When contacting your carrier, have your phone number, account verification details, and the new iPhone’s EID ready. Ask the representative to issue a new eSIM activation if the original profile is stuck. Avoid deleting the eSIM from the old iPhone until the carrier confirms the replacement plan is active, unless the transfer process itself instructs you to do so.
Do Not Erase Your Old iPhone Too Soon
The safest time to erase or trade in your old iPhone is after you have tested the new one. Make a call, receive a call, send an SMS text, test cellular data with Wi-Fi turned off, and verify that iMessage and FaceTime use the right number.
This final check matters because some services take longer to recognize a transferred number. For example, iMessage may briefly continue using an email address or show the old number while Apple updates activation. Go to Settings > Apps > Messages > Send & Receive and Settings > Apps > FaceTime to confirm the correct number is selected.
If you are traveling, be especially careful with travel eSIMs. Transfer your primary number first, then decide whether the travel plan should stay on the old phone, move to the new phone, or be replaced with a fresh plan. Not every travel eSIM can be transferred between devices.
A successful eSIM move is mostly about patience and timing. Keep the old iPhone intact until the new one can handle the everyday basics, and you will avoid the frustrating moment when your new phone is ready but your number is not.