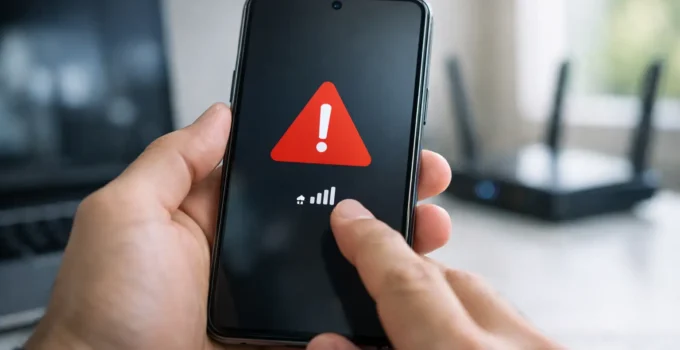
A phone that suddenly says “Not registered on network,” “Emergency calls only,” or “No service” can turn a normal day into a problem fast. To fix android network registration error messages, start with the simple connection checks, then work toward SIM, account, and carrier issues. The right fix depends on whether your phone lost service after an update, a trip, a carrier switch, or for no obvious reason at all.
What Does an Android Network Registration Error Mean?
Your Android phone has to register with your wireless carrier before it can place calls, send standard text messages, and use cellular data. An error means the phone cannot complete that connection. It may see nearby cell towers but still be unable to verify your SIM or eSIM, authenticate your account, or connect to the network technology your plan supports.
This is different from a weak signal in one building. If your phone works outside or in another neighborhood, coverage is the likely issue. If it shows the same registration error everywhere, focus on the phone, SIM, carrier account, or a local carrier outage.
How to Fix an Android Network Registration Error
Work through these fixes in order. After each one, wait a minute or two and check whether the signal bars return. Try making a call or sending a text to confirm the phone is fully connected.
Turn Airplane Mode On and Off
Open Quick Settings by swiping down from the top of the screen, turn on Airplane mode, and leave it on for about 30 seconds. Then turn it off. This forces the phone to stop searching for its current connection and make a fresh attempt to register.
It sounds basic, but it is one of the fastest fixes after moving between areas with different tower coverage, coming out of a parking garage, or landing after a flight. If you use a dual-SIM phone, make sure Airplane mode is off for both lines before testing again.
Restart Your Android Phone
Restarting clears temporary cellular processes that can get stuck after an Android update, an app crash, or a failed handoff between towers. Press and hold the power button, select Restart, and give the phone time to boot completely.
On some Samsung Galaxy phones, you may need to press and hold the Side button and Volume Down button together to reach the power menu. Once the phone restarts, leave it alone for a minute so it can search for and join the carrier network.
Check That Your SIM or eSIM Is Active
If your phone uses a physical SIM, power it off and remove the SIM tray. Check that the card is sitting flat in the tray and is not visibly damaged, warped, or covered in dust. Reinsert it carefully, turn the phone back on, and test service.
For an eSIM, go to Settings, then Network & internet, Connections, or Cellular, depending on your Android brand. Confirm that the eSIM line is turned on. A carrier transfer, factory reset, or device repair can sometimes disable or remove an eSIM profile.
If you recently moved your number to a new phone, do not assume the old SIM will work automatically. Some carriers require a new SIM or eSIM activation when you change devices, especially if you moved from an older LTE phone to a newer 5G model.
Set Network Selection to Automatic
A phone can fail to register if it is locked onto the wrong carrier network manually. Go to Settings and look for Mobile network, SIMs, or Connections. Select your active SIM, open Network operators, and turn on Select automatically or Choose automatically.
Manual network selection can be useful when traveling or diagnosing a roaming problem, but it should not be left on for normal use. Your phone needs the freedom to choose the appropriate partner network and available tower.
Check Your Preferred Network Type
In the same Mobile network area, look for Preferred network type or Network mode. Select an option that includes 5G and LTE, such as 5G/LTE/3G/2G (auto connect). The exact wording varies by phone and carrier.
Do not force the phone to use 5G only unless your carrier specifically tells you to. 5G coverage is not available everywhere, and many calls still rely on LTE features. Likewise, older 3G networks have been shut down by major US carriers, so an aging phone that depends on 3G may no longer register reliably.
Install Android and Carrier Updates
Go to Settings > System > Software update and install any available Android update. Phone makers often include modem and connectivity improvements in these releases. Samsung users can typically find this under Settings > Software update, while Google Pixel users will see it under Settings > System > Software updates.
Also check for a carrier settings update. On many Android phones, opening Settings > About phone can trigger a prompt if one is available. These updates can adjust how the device connects to a carrier after network changes.
Reset Mobile Network Settings
If the error continues, reset the phone’s network settings. Search Settings for “Reset network settings” if you cannot find the menu. It is commonly located under System > Reset options or General management > Reset.
This will remove saved Wi-Fi networks, Bluetooth pairings, and cellular preferences. It will not erase photos, apps, or messages. You will need to reconnect to home Wi-Fi and pair accessories again, but the reset can clear a damaged cellular configuration that a normal restart does not fix.
Check for a Carrier or Account Problem
If multiple people using the same carrier have no service in your area, the problem may be an outage. Wi-Fi calling can be a useful temporary option if it was already enabled, but it will not repair cellular registration by itself.
Next, sign in to your carrier account from another device or contact customer support. Ask whether your line is active, whether there is an outage at your location, and whether your phone’s SIM or eSIM is properly provisioned. A suspended line, unpaid balance, recent number port, or activation that did not finish can all trigger a registration error.
If you are traveling internationally, verify that your plan includes roaming and that roaming is enabled for the line. You may need to select a supported local network manually for testing, but switch network selection back to automatic after the carrier confirms which network you should use.
When the Phone May Be the Problem
A SIM that works in another compatible phone points to an issue with your Android device. A different active SIM that fails in your phone points in the same direction. In either case, a carrier store or qualified repair shop can check the device’s radio hardware and verify its IMEI status.
You can usually view the IMEI in Settings > About phone or by dialing *#06#. If the phone was purchased used, reported lost or stolen, or has an unpaid device balance tied to it, it may be blocked from registering on US carrier networks. Do not try to change or alter an IMEI. Carriers can confirm whether the device is eligible and whether it supports their network bands.
A factory reset is a last software step, not the first one. Back up your photos, messages, authenticator apps, and files before considering it. If the phone still cannot register after a reset and a carrier confirms the line and SIM are good, the practical answer may be device repair or replacement.
Avoid the Same Error Later
Keep Android updated, avoid removing a SIM while the phone is powered on, and make sure a transferred eSIM is fully activated before wiping or trading in an old device. When buying a used Android phone, check that it is unlocked, compatible with your carrier, and not blocked before handing over payment.
Most registration errors are fixable with a fresh network connection, correct settings, or help from the carrier. If none of those steps restore service, treat the error as a useful clue: it narrows the problem to the SIM, account, coverage, or phone itself.