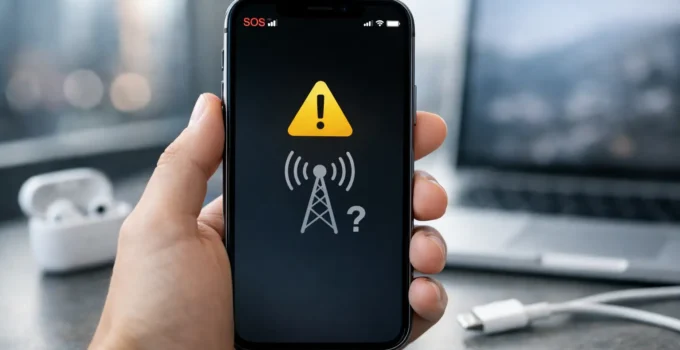
Seeing SOS Only in the top-right corner of your iPhone can be alarming, especially when calls, texts, and mobile data suddenly stop working. The good news is that this status usually points to a connection problem, not a broken iPhone. To fix iPhone SOS Only, start by checking whether the issue is local coverage, a carrier outage, or a problem with your SIM, eSIM, or network settings.
SOS Only means your iPhone cannot connect to your regular cellular carrier, but it may still be able to place emergency calls through another available network. It is not the same as having normal service, and it can appear even if you usually have a strong signal in the same area.
What Does SOS Only Mean on an iPhone?
An iPhone displays SOS Only when it cannot register on your carrier’s cellular network. On some iPhones and in some regions, you may see SOS rather than SOS Only. The meaning is generally the same: ordinary cellular service is unavailable.
Wi-Fi can still work while SOS Only is showing, so apps such as Messages, FaceTime, WhatsApp, and email may function if you are connected to a trusted Wi-Fi network. However, standard calls and SMS messages that rely on cellular service may not work.
The cause can be simple, such as being in a parking garage, rural area, or building with poor reception. But if the status remains after you move to an area where service normally works, it is time to troubleshoot.
Quick Checks to Fix iPhone SOS Only
Before changing deeper settings, try a few basic checks. These solve a surprising number of temporary network problems.
First, move outdoors or to a different location. Thick walls, underground spaces, elevators, and remote areas can block cellular signals. If your service returns after moving, your iPhone is likely fine and the issue is local coverage.
Next, turn Airplane Mode on for about 15 seconds, then turn it off. Open Control Center by swiping down from the upper-right corner of newer iPhones, tap the airplane icon, wait, and tap it again. This forces your iPhone to search for a cellular network again.
If that does not help, restart the iPhone. A restart clears many temporary connection errors without removing your apps, photos, or data. On most newer models, press and hold either volume button and the Side button, then slide to power off. Wait 30 seconds before turning the phone back on.
Also check whether your cellular line is enabled. Go to Settings > Cellular and make sure your primary line is switched on. If you use dual SIM or an eSIM alongside a physical SIM, confirm that the correct line is active and selected for cellular data.
Check for a Carrier Outage or Account Issue
If several people using the same carrier have no signal in your area, an outage is more likely than an iPhone fault. Ask someone nearby with the same carrier, or use Wi-Fi to check your carrier’s official service-status information.
Outages can affect only calls, only data, or specific neighborhoods. In those cases, resetting your phone repeatedly will not restore service. The practical answer is to wait for the carrier to repair the network.
It is also worth checking your account. A suspended line, unpaid bill, recently changed plan, or a number transfer that has not completed properly can all cause SOS Only. This is especially common after switching carriers, activating a new iPhone, or converting a physical SIM to an eSIM.
If your account looks normal but the problem continues, contact your carrier from another phone or through Wi-Fi. Ask whether your line is active, whether there is an outage, and whether they can refresh or reprovision the connection on their end.
Update Carrier Settings and iOS
Carriers occasionally release small configuration updates that help an iPhone connect correctly to their network. To look for one, go to Settings > General > About. Wait on that screen for around 30 seconds. If a carrier settings update is available, your iPhone should show a prompt to install it.
You should also check for an iOS update at Settings > General > Software Update. Network bugs can be fixed in iOS updates, particularly after a major release. Install updates over Wi-Fi, preferably with the iPhone charged or connected to power.
An update is not a guaranteed cure if the issue is a carrier outage or damaged SIM, but keeping iOS current removes one common cause. If SOS Only began immediately after an iOS update, do not assume the update caused it. A network registration issue, carrier problem, or timing coincidence may be responsible.
Check Your SIM Card or eSIM
A damaged, loose, or inactive SIM can prevent an iPhone from connecting to a carrier. If your iPhone has a physical SIM card, power it off first. Remove the SIM tray using the proper eject tool, inspect the card for obvious damage or dirt, then place it back securely.
Do not force the tray, use a wet cleaning product, or touch the metal contacts more than necessary. If the SIM looks cracked, heavily scratched, or warped, request a replacement from your carrier.
For eSIM users, go to Settings > Cellular and tap your cellular plan. Check that Turn On This Line is enabled. If the plan is missing, shows an activation error, or repeatedly loses service, your carrier may need to issue a new eSIM activation.
Avoid deleting an eSIM plan unless your carrier has instructed you to do so and you know how it will be reactivated. Deleting it before you have replacement activation details can leave you without cellular service for longer.
Reset Network Settings if SOS Only Will Not Go Away
If the earlier steps have not worked, reset the iPhone’s network settings. This removes saved Wi-Fi networks and passwords, Bluetooth pairings, VPN settings, and cellular network preferences. It does not erase photos, apps, messages, or other personal files.
Go to Settings > General > Transfer or Reset iPhone > Reset > Reset Network Settings. Enter your passcode if asked, then confirm the reset. Your iPhone will restart.
After it turns back on, reconnect to Wi-Fi and give the phone a few minutes to find your cellular network. If service returns, the issue was likely a corrupted network configuration. If it stays on SOS Only, the problem may be with the carrier, SIM or eSIM provisioning, or the iPhone’s cellular hardware.
When SOS Only Happens While Traveling
Travel adds a few extra possibilities. If you are outside your home country, verify that Data Roaming is enabled when your plan supports it. You can find this under Settings > Cellular > Cellular Data Options. Roaming may involve extra charges, so confirm your plan details before leaving it enabled.
If you bought a local SIM or travel eSIM, make sure that line is turned on and selected for cellular data. Some plans require you to choose a specific network manually, while others connect automatically. Your carrier or eSIM provider can tell you the correct network settings.
An iPhone that is carrier-locked may not accept a SIM from another network. You can check this by opening Settings > General > About and looking for Carrier Lock. If it says no SIM restrictions, the phone is unlocked. If not, only the original carrier can usually remove the lock after eligibility requirements are met.
When to Contact Your Carrier or Apple
Call your carrier if SOS Only affects only your line, your account has recently changed, or a replacement SIM or eSIM may be needed. They can verify activation status and check whether the phone is being blocked from their network.
Contact Apple Support or visit an authorized repair provider if your iPhone has been dropped, exposed to liquid, had a repair, or still cannot find any cellular network after a known-working SIM is tested. Persistent SOS Only across multiple carriers can indicate a hardware issue with the antenna, SIM reader, or cellular modem.
If you need help urgently, connect to Wi-Fi and use Wi-Fi calling if it was already enabled, or use internet-based calling apps. For emergencies, follow the options shown on your iPhone and contact local emergency services when possible.
SOS Only is frustrating, but it is usually a useful clue rather than a disaster. Work through the checks in order, avoid deleting an eSIM without a reactivation plan, and let your carrier confirm the status of your line before assuming the iPhone needs repair.